It’s hard to overstate the importance of a strong core. Whether it’s keeping you upright while reading this article or powering you through tough, explosive workouts, the body’s core supports and enables nearly every move you make.
“The foundation of movement and physical fitness is posture—the ability to maintain joint alignment whether you are moving, sitting, or standing,” explains Mark Lauren, U.S. Special Operations trainer and author of You Are Your Own Gym. “Having good posture is largely dependent on your body being able to maintain a strong midsection.”
Because they require spinal and pelvic stabilization, body-weight exercises are particularly good for developing core strength. Lauren designed this body-weight routine, which is best done three to five times a week, to target the core from all angles.
Perform each exercise in this circuit for 40 seconds, resting for 20 seconds between exercises. Complete the circuit three times.
Move #1: The Bodyrock
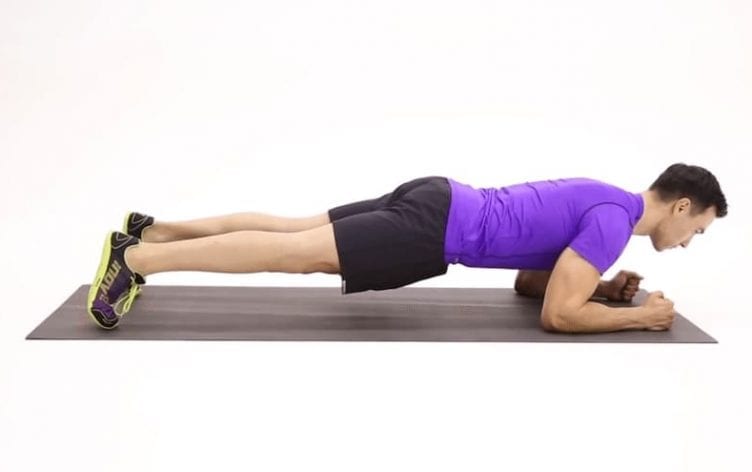
- Start in a plank position with your feet at hip width, forearms on the floor, and shoulders directly above your elbows. Push your heels back as far as possible to lengthen your legs. The balls of your feet should rest on the floor.
- Keeping your back flat and abs engaged, rock from the balls of your feet to your toes to shift your body forward. When you’re in the forward “toe” position, you want to avoid going too far and having the tops of your feet touch the floor. Your shoulders will move beyond your elbows.
- Rock forward and backward slowly and steadily. Remember to keep your back flat and abs engaged throughout the movement.
Move #2: Birddogs
- Start on your hands and knees with core engaged.
- Maintaining a tight core, extend your right leg behind you and your left arm in front of you, keeping your toes and fingers on the floor.
- From this position, simultaneously raise your right leg (by contracting your right glute) and left arm until they are parallel to the floor. Focus on not arching your back and keeping hips level. Hold for three seconds and then return to the start position.
- Repeat with the opposite arm and opposite leg. Remember to keep your core tight and your hips level throughout the movement.
Move #3: Tripod Scissor Kicks
- Start in a plank position on your hands with your feet in a wide stance (the wider, the more challenging). Place your weight on the thumb-sides of your palms, with fingertips pressed into the floor.
- Keeping your head, neck, and shoulders aligned and your bellybutton drawn in toward your spine, extend your right hip to lift your right foot. Then move your right leg (still elevated) inward to hip width. Move your leg back outward, then return your foot to the floor.
- Repeat on the left side. Continue alternating sides. Remember to keep your head, neck, and shoulders aligned throughout the movement.
Move #4: Y-Squat
- Stand with your feet at hip width and toes facing forward; if it feels more natural to have your toes slightly turned out, that’s fine. Raise your arms overhead in a Y position with your palms facing forward.
- Bend your knees as you push your hips backward to lower into a squat. Go as low as you can while keeping your lower back flat and knees in line with your feet. Maintain the Y position with your arms and keep your elbows aligned with the sides of your head.
- Drive your weight through your heels as you engage your glutes and straighten your legs to rise to a standing position.
Move #5: Dead bug
- Lie on your back with your arms straight up (fingers pointing toward the ceiling and palms facing forward), both legs in a tabletop position, with your knees bent at a 90-degree angle and directly over your hips. You should feel a small space between your lower back and the floor. Draw your navel toward your rib cage, tilting your pelvis back, to close this space.
- Exhale as you slowly extend your right leg so that it hovers about 6 inches above the floor. As you do this, extend your left arm back behind your head. Hold this position for up to three seconds, or for as long as you are able, while maintaining a flat back. Inhale as you return your arm and leg to the starting position. Your lower back should remain pressed against the floor the entire time.
- Perform the movement with your left leg and right arm. Continue alternating sides.

